Adding Digital Ocean Insights to droplet

The digital ocean instructions for adding their insights agent use the out of date apt-key mechanism

Installing using the latest method is simple – make sure the keyrings directory exists:

mkdir -p /etc/apt/keyrings

Then download the key and dearmour to the keyrings directory as follows:

curl https://repos.insights.digitalocean.com/sonar-agent.asc | sudo gpg --dearmour | sudo tee /etc/apt/keyrings/do-insights-repo.gpg > /dev/null

the create the repo source:

echo "deb [arch=amd64 signed-by=/etc/apt/keyrings/do-insights-repo.gpg] https://repos.insights.digitalocean.com/apt/do-agent/ main main" | sudo tee /etc/apt/sources.list.d/digitalocean-agent.list

Then update the repos:

sudo apt update

Install the agent:

sudo apt install do-agent

Check it’s running using:

ps aux | grep do-agent

Now check on the Digital Ocean dashboard you should 5 graphs on the droplet’s Graphs tab instead of 3.

Update your apt keys for Ubuntu and other Debian based operation systems

You may get a warning from a modern Debian based operating system which says:

Warning: apt-key is deprecated. Manage keyring files in trusted.gpg.d instead (see apt-key(8)).

Essentially the apt-key framework is being retired and you need to store your keys in separate files in the /etc/apt/trusted.gpg.d/ directory rather than using apt-key to manage

If when you run:

sudo apt-key list

Any keys listed under the heading of

/etc/apt/trusted.gpg

should be migrated. This procedure is described below. Before you start make sure the keyrings directory exists (not required if you are using Ubuntu 22.04)

sudo mkdir -p /etc/apt/keyrings

From the list produced by the “apt-key list” command, a key can be uniquely identified by the last 2 sets of hexidecimal numbers on the second line of the pub section. For example if the numbers are DE57 BFBE you can use the string DE57BFBE to identify the key. So you can export it using the following command (replace the DE57BFBE with the actual last digits of the key and <repo-name> with a unique name in that directory):

sudo apt-key export DE57BFBE | sudo gpg --dearmour -o /etc/apt/keyrings/<repo-name>.gpg

You can then update the repository definition to use this key. for example if your repo was:

deb [arch=amd64] https://repo.awesome.io/repo/py3/ubuntu/22.04/amd64/latest jammy main

and you used the filename awesome.gpg then you’d enter:

deb [signed-by=/etc/apt/keyrings/awesome.gpg arch=amd64] https://repo.awesome.io/repo/py3/ubuntu/22.04/amd64/latest jammy main

You can then list the key using “sudo apt-key list” – and use “sudo apt update” to update your apt indexes.

With all that working delete the old key from the trusted.gpg using the command:

sudo apt-key del DE57BFBE

Enjoy!

Using chroot to install the GRUB2 bootloader

You can use chroot from a live CD or USB to update or install GRUB on a Linux system where, for example, your master boot record has been overwritten by installing windows. This post explains how… If you need to chroot to do something other than fix GRUB you can use the relevant sections of this procedure.

Boot from live CD and access the partition where Linux is installed.

Boot the system from a live CD (you can obtain one from the download section of www.ubuntu.com or www.debian.org, it does not really matter which version or even which Linux distribution as long as it gives you access to a terminal session).  Once booted, on Ubuntu / Debian you can usually open a terminal window using Ctrl-Alt-T or from the Accessories menu or type terminal into the Dash.  I’ve shown all command that need to be run as root proceeded by “sudo” if you have logged in as root or become root using “sudo -i” or “su -” you don’t need to include sudo in each command.

Many modern distros provide the facility to mount the local hard drive automatically using the file manager.  If your system does not automatically mount partitions you’ll need to create a mount point e.g

sudo mkdir /root-partition

You will then need to find the partition containing your linux root partition “sudo fdisk -l” may provide this information.

sudo mount /dev/sda1 /root-partition

From here on I’ll assume your mount point is /root-partition if your distro mounted the drive for you automatically you’ll need to substitute the mount point it created in the following commands.  Alternatively you can create a link to it (this is useful if your system mounts using the very long uuid of the disk. for example if your system mounted the partition as /mount/point/created/automatically create a link to it as follows

sudo ln -s /mount/point/assigned/automatically /root-partition

Prepare for chroot

When you chroot the directory that you specify becomes the new root partition hiding the current one.  To access the devices and processes currently on the system you need to rebind /proc /sys /dev from the existing root partition to the new one this is done using “mount – o bind”

sudo mount -o bind /proc /root-partition/proc
sudo mount -o bind /sys /root-partition/sys
sudo mount -o bind /dev /root-partition/dev
sudo mount -o bind /dev/pts /root-partition/dev/pts

Updating GRUB does not require network connectivity but if you’re using chroot for some other reason you may require it, assuming your your live CD has set up network connectivity you’ll need to the save the resolv.conf and copy the one created on the live cd for DNS to work.

sudo cp /root-partition/etc/resolv.conf /root-partition/etc/resolv.conf-save

sudo  cp /etc/resolv.conf /root-partition/etc/resolv.conf

Now execute the chroot opening a bash session

sudo chroot /root-partition   /bin/bash

Update or install GRUB

Grub is often configured to use a separate partition which is mounted as /boot.  If this is how your system is set up you’ll need to mount this partition (e.g. on the system I’m using to write this tutorial it’s a the fifth partition on the first disk or /dev/sda5, your will almost certainly be different “sudo fdisk -l” may help you indentify it’s usually a small ext2 partition) This is mounted as follows

mount /dev/sda5 /boot

Note you don’t need to use sudo as when you chroot you become root.  Substitute the actual partition that /boot is located on your system.

I’m assuming GRUB was set up correctly before your master boot record was overwritten, if you need to set up grub you should use one of the excellent tutorials out there.  If you’ve installed another linux version on your system you may already have grub setup in the master boot record in which case you can simply run update-grub other wise you’ll need to run grub-install.  Most linux distros provide a GRUB configuration that does a good job of detecting other linux distros and windows.

Before you run update-grub may want to save the current grub.cfg file as follows

cp /boot/grub/grub.cfg /boot/grub/grub.cfg-save

Run update-grub to create the new configuration (this will not change the master boot record however if your system has GRUB installed on the master boot record this will alter the configuration)

update-grub

You can then examine the configuration created by looking at the file /boot/grub/grub.cfg.  Once you are happy that it’s created correctly

grub-install /dev/sda

The master boot record that you need to update is often on the first disk (device name /dev/sda) Note /dev/sda is the entire disk partitions are names from 1 e.g. /dev/sda1)

 Exit from chroot

To exit from chroot it’s the same as exiting from any shell, simply type

exit

or use Ctrl – D

When you reboot, you should now be able to access your linux partition again.

df displays UUID rather than the device name

Several distros set up your boot device in grub using the UUID.  Unfortunately this can cause the output from the df command to display the long uuid (e.g. /dev/disk/by-uuid/0ebcf386-83eb-4639-b1ba-be73a7f60efc) rather than the device name (e.g. /dev/sda1)

To change this edit the file /etc/default/grub on Debian use the command

sudo vi /etc/default/grub

find the line which contains

GRUB_DISABLE_LINUX_UUID=true

If it has a # as the first character on the line this character should be deleted then save the file.

Now update the grub using the command

sudo update-grub

After you reboot the df command will display the device name.

Ubuntu 12.10 on AMD64 hardware reports missing microcode

On upgrading to Ubuntu 12.10 and rebooting the system (which has a AMD Phenom II processor) the system reported “failed to load file amd-ucode/microcode_amd.bin”.

This indicates that the the microcode kernel module has been unable to find the amd-ucode directory in “/lib/firmware”

Fortunately this is easily fixed:

  • create the directory “/lib/firmware/amd-ucode” if it does not already exist using the command 

mkdir /lib/firmware/amd-ucode

  • Browse to http://www.amd64.org/support/microcode.html.  Here you will find information on AMD’s Linux support.
  • Download the file “amd-ucode-latest.tar” you should see a link to this at the bottom of the page.  (It’s good practice when downloading critical software like this to verify the PGP signature of the file, the above page provide conveniently provides instructions so I won’t repeat them here)
  • Extract the file using the Archive manager open a command prompt navigate to the directory where you downloaded the file and type 

tar xf amd-ucode-latest.tar

  • This creates a directory (at the time of writing it is called “amd-ucode-2012-09-10” but you may have a later version)
  • From this directory you need to copy or move the files “microcode_amd.bin” and “microcode_amd_fam15h.bin” the first supports several older generations of AMD hardware and the second supports the 15h family.  There are several readme files and some which provide support for Solaris X86.
  • Copy the microcode_amd.bin files and microcode_amd_fam15h.bin files using the following command (the microcode module will use only the section of these files which are needed for your hardware)

cp microcode_amd.bin   /lib/firmware/amd-ucode

cp microcode_amd_fam15h.bin    /lib/firmware/amd-ucode

  • To activate these modules you can reboot or use the modprobe command to remove and reinstall the microcode kernel module as follows
  • modprobe -r microcode modprobe microcode
  • Next time you boot the “failed to load” message should no longer be displayed and the processor microcode should be updated correctly.
  • To check that it is updated type the following at a command prompt

dmesg | grep microcode

This will display output similar to the following:

[ 14.174582] microcode: CPU0: patch_level=0x010000c8
[ 14.222343] microcode: CPU1: patch_level=0x010000c8
[ 14.223834] microcode: CPU2: patch_level=0x010000c8
[ 14.225326] microcode: CPU3: patch_level=0x010000c8
[ 14.226881] microcode: Microcode Update Driver: v2.00 <tigran@aivazian.fsnet.co.uk>, Peter Oruba


Change the overlay scroll bars in Ubuntu 11.04 / 11.10

Ubuntu Unity introduced new overlayed scrollbars. If you don’t like them you can remove them as follows.

Command line method

If you are happy using the command line and have sudo privileged, open a terminal window (Ctrl -Alt-T) and type

sudo apt-get remove overlay-scrollbar

You’ll be prompted for your password.  Some applications running may need to be restarted to use the default scrollbars.

Alternative using the Software center

If you don;t have sudo privilege or you prefer a to use the a GUI application.  Open the Ubuntu Software Centre (from launcher or click on the dash and type soft – the software center should appear in the list, click on it)

In the search bar on the top right enter “overlay”. At the botton of this window click on the Display ?? technical items” link. This will display several Scrollbar overlay entries.

Near the top of the list will be one called “Scrollbar Overlayed widget” with a package name of “overlay-scrollbar”. Select the Remove button.

Next find an one or more entry called “Scrollbar overlayed widget – shared lib”. Select the Remove button for each of these in turn.

With all these entries removed your scrollbars should revert to standard scrollbars.

If you have applications running you probably need to close and restart them for the change to take effect. Some applications may require a system restart to make the standard scrollbars available.

Create Launcher in Ubuntu 11.10

Ubuntu 11.10 no longer has the Create Launcher option in the Desktop right click menu. A launcher items can still be created by installing the gnome-panel.

1) Start “Ubuntu Software Center” from the Launcher

2) Type “gnome-panel” into the search bar, the item “launcher and docking facility for GNOME” will be displayed

3) Click on it and if a “Install” button is available on the right side click it. Authenticate when asked to do so

4) When the install is complete open a terminal window (click on the terminal item in the launcher.

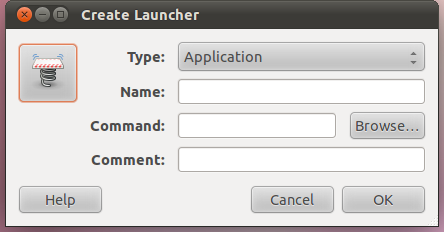
5) Type “gnome-desktop-item-edit ~/Desktop/ –create-new” and press enter. The following window will be displayed
Create Launcher Dialog

6) Enter the details of the program, change the icon by clicking on the icon and choosing an appropriate icon and click OK.

7) You now have launcher item on the Desktop to add this to the launcher. Open your Home Folder. (if hidden files are not shown press Ctrl + H and browse to .local/share/applications. Drag and drop your Launcher item from Desktop to that folder.

8) Now drag and drop your launcher from .local/share/applications to the Launcher Bar on the left on your Screen.

9) You can now delete your custom Launcher on the Desktop if it’s still there.

10) Enjoy…

Launcher icons and System Menu missing after upgrade to Ubuntu 11.10

Many people have reported that the upgrade from Ubuntu 11.04 to Ubuntu 11.10 means that they loose the icons for Home Folder, Terminal, Workspace Switcher and Rubbish Bin (Trash) and are replaced by a bland icon. Also the System Menu in the top right of the desktop disappears.

Fortunately there is a simple solution.

1) Click on Dash Home and type System into the search bar

2) Launch System Settings and choose Appearance

3) In the bottom right corner is a drop down which is probably set to Ambiance, Change this to Radiance or one of the other settings and close the window.

Now the launch icons are restored and the Gear icon for the system menu is restored to top left. Should you wish to return to the Ambiance theme no problem the icons etc. will still be there. The act of changing the theme restores the items.

Setting up Samsung CLX3175FW Printer on Ubuntu 11.04

I’ve seen several articles on setting up the Samsung CLX3175FW as a network printer on Ubuntu. Some warn against using the Samsung drivers others suggest using them…

Here’s the easiest way I found to set it up on Natty Narwhal…

Ensure that the printer is switched on and connected to the network, you’ll also need to be connected to the internet to download the drivers.

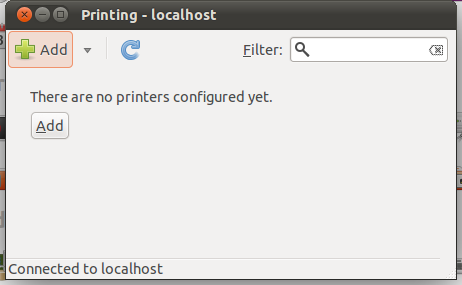
From System Settings choose Printing. The following dialog is displayed

Setup Samsung CLX3175FW

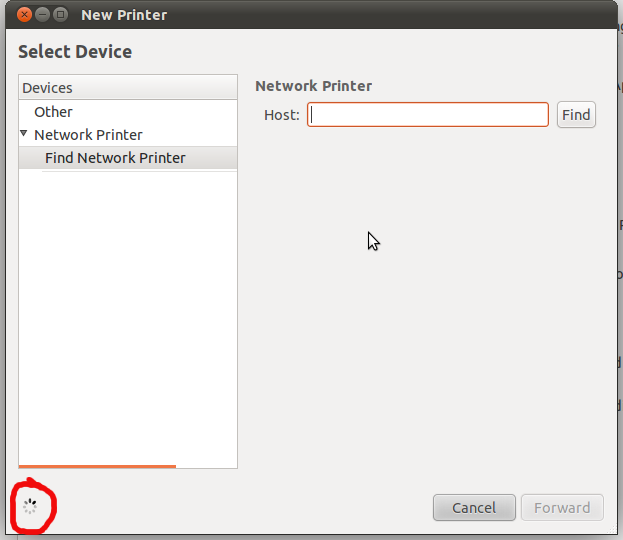
From this screen select “Add”, this dialog is displayed

Setup Samsung CLX3175FW

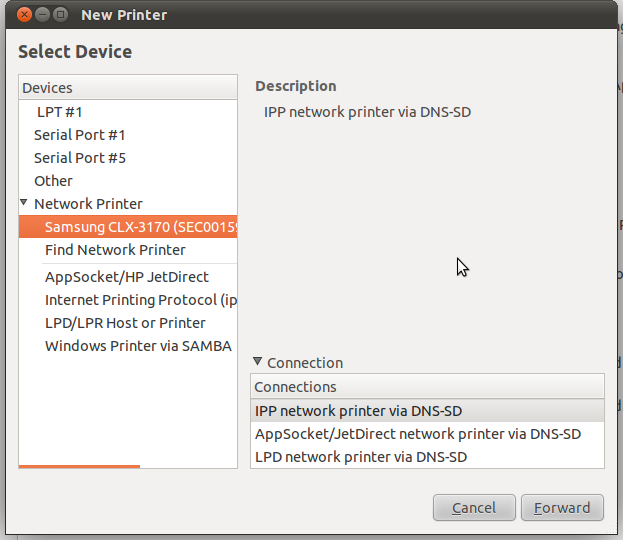
Click on the Network printer item to expand it and wait while the system searches the network, you’ll notice a activity icon in the bottom left. The printer is found automatically and the following dialog is displayed

Setup Samsung CLX3175FW

Select the Samsung CLX-3170 item in the list and click “Forward” the following dialog is displayed

Setup Samsung CLX3175FW

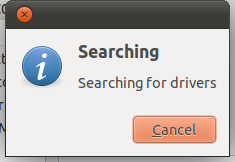
Wait for the search to complete and the following dialog is displayed

Setup Samsung CLX3175FW

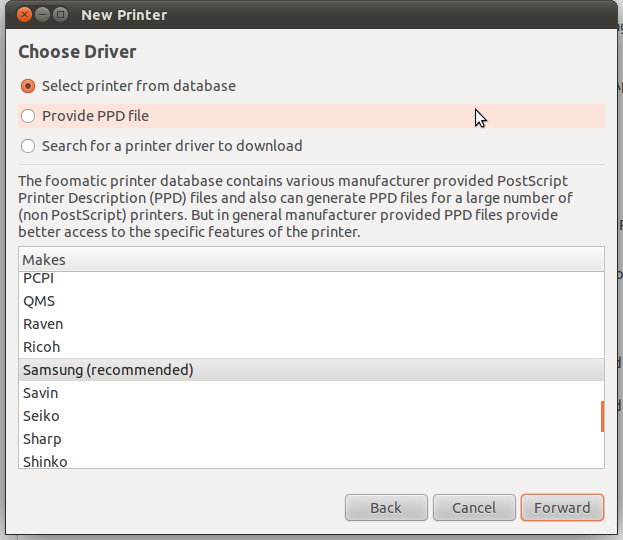
Select Samsung (Recommended) and click “Forward”

Setup Samsung CLX3175FW

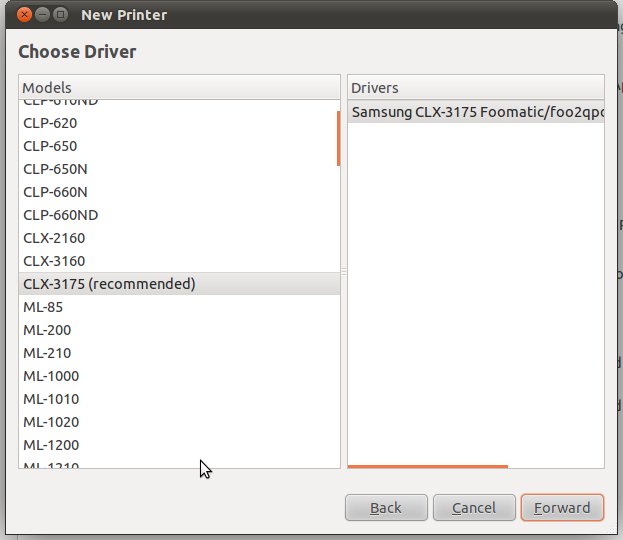
Select “CLX3175 (Recommended)” and click “Forward”

Setup Samsung CLX3175FW

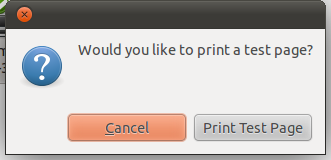
Just to confirm that it is set up correctly you can print a test page, my system defaulted to printing in Monochrome which is fine by me but you may want to print a test page in colour, I’ll show you how to do that later. If you select “Print Test Page” the following will be displayed…

Setup Samsung CLX3175FW

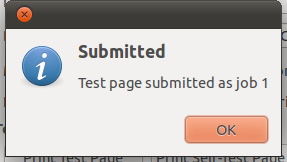
Click OK, the following dialog is displayed

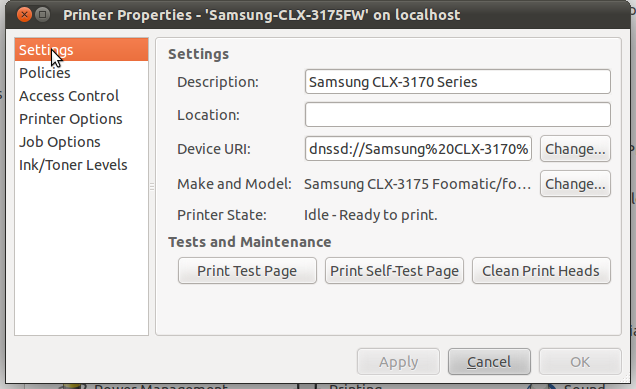
Setup Samsung CLX3175FW

You can Choose “Printer Options” from the list to change to colour and then return to the settings item and print a test page using colour.

Now you have a printer set up and ready to use…

Adding a New Program to the Ubuntu 11.04 Unity Launcher Panel

Please note: this post relates to 11.04 only, if you are using a later version see the this post.

Some programs like the Eclipse IDE have to be installed manually they’re not available from the Ubuntu Software Centre. To add these to the launcher panel in Ubuntu Unity first you need to create a desktop file (Unity calls it a launcher), save it in the applications folder, then you can just drag it to the launcher panel.

Create the Launcher on the Desktop:

Right click your desktop and select “Create Launcher…”. The following window will be displayed
Create Launcher Dialog
Enter the details of the program, change the icon by clicking on the icon and choosing an appropriate icon.
This gives you a launcher on the Desktop

Add the Launcher Panel:

Open your Home Folder. (if hidden files are not shown press Ctrl + H and browse to .local/share/applications. Drag and drop your Launcher from Desktop to that folder.

Now drag and drop your launcher from .local/share/applications to the Launcher Bar on the left on your Screen.

You can now delete your custom Launcher on the Desktop if it’s still there.

Enjoy…